
This is a sequel to my Advanced Dialogue Box Tutorial and we will just be adding to that in this tutorial. So if you haven’t read through that one, I highly suggest you do so.
Lets Get Started:
Ok so open up your dialogue object (that you created in my first tutorial) and your Create event should look something like this:
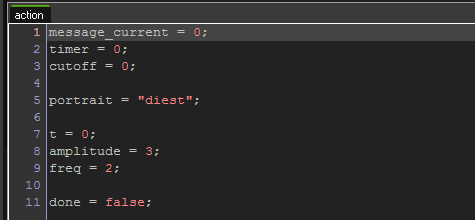
Make sure you have these lines:
t = 0;
amplitude = 3;
freq = 2;
everything else should be from the first tutorial.
Wavy Text Effect:
Now we’re going to get a little mathy.
oh god, no please, no, not MATH! I thought we were making games?!
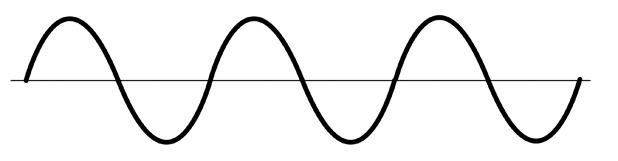
I’ll spare you the explanation of the calculation but basically we’re making each character’s y position follow that of a sine function graph. Which looks like this:
(If you want to know more about the actual math go ahead and google Trigonometry and the various trig functions. Its actually pretty cool stuff that might help you out with other game related stuff.)
So now in the beginning of your Draw event add this line of code:
t++;
Here all we are doing is making the “t” variable increment by one every step.
Now go to your switch statement for your modifiers, create a new modifier and add this:

Here we are creating two variables.
variable “so” simply has the “t” variable with the “i” variable (our current space in the message) added to it.
variable “shift” contains the math needed to actually create the sine movement. GameMaker has a built in sine function so we’re using that. We take our “so” variable multiply it by Pi (another built in function) then multiply it by our “freq” variable, then divide it all by the room speed. We let gamemaker do the sine calculation of this, then we multiply is by our “amplitude” variable.
In the draw_text line we’re adding “shift” to the y argument.
So basically we need a variable that is always increasing (which is our “t” variable) then we add “i” to it so each character in our message has their own unique sine movement. If we did not add “i” to it, every character would move up/down at the same time rather than individually.
Our “freq” variable is basically the speed at which the characters move up/down. If you’d like them to move faster, increase this variable, if you’d like them to move slower, decrease this variable.
Our “amplitude” variable is how far up/down the character will go. I keep it at 3 because it has enough space to move, but doesn’t overlap any characters in other lines.
So if you’ve done this all correctly you’ll be able to create wavy text like this:

Color Shifting Effect:
Now we’re going to make the text shift in color.
Create a new modifier and add this:

Here we are creating two variables “col” and “col2″
We are using the “make_colour_hsv” function built into GameMaker to actually shift color. The first argument in the function is for the hue. So we are using the “t” variable, and as we know, its always increasing as long as the dialogue is open. Then we are adding “i” to it so each character will get their own unique place on the hue graph. In “col2″ we are doing almost the exact same thing except adding “75″ to “t+i” so “col2″ is slightly ahead on the hue graph than “col”
Now we use the “draw_text_transformed_colour” function built into GameMaker to add a gradient to our characters. if you look at the last few arguments, These are what color you want on each corner of the text (top left, top right, bottom right, bottom left.) So we add “col” to the top section and “col2″ to the bottom section, this way the top and bottom areas of our characters will be different colors, and GameMaker will create a gradient between the two for us.
If you’ve done this correctly then you should be able to create color-shifting text like this:

Multiple Dialogues Script:
You don’t want to have to create a new dialogue object for EVERY instance of dialogue in your game right? No. So we can easily create a script which will modify the one dialogue object we have and create a new dialogue whenever we want.
Create a new script and add in this:
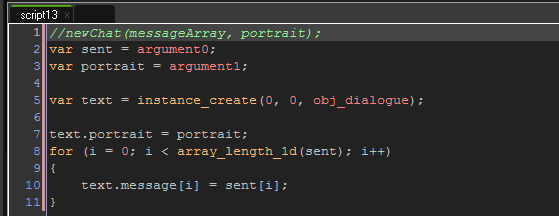
I named my script newChat.
So basically how this works is you’ll create an array of the messages you want in your new dialogue then pass them through this script along with whatever portrait you want to display. So it’ll look something like this when called:
newChat(message, “none”);
In the script we are creating two variables, “sent” and “portrait”
“sent” will contain the array of messages. “portrait” will contain the portrait we want to display.
We then create an instance of our dialogue object (which I named “obj_dialogue”) assigned to the variable “text”
Next we make our new dialogue object’s portrait variable equal to what we passed into the script.
After this we use a for loop to read every line of text in our “sent” array (which we read into the script) into the “message” array in the dialogue object.
Now that we’ve created a new instance of our dialogue object, it will start displaying in our game.
NOTE: you will most probably have this somewhere in your Step event. Remember that the Step event runs every frame of your game. So you need to make sure that you’re only running this line ONCE or you’ll be creating several dialogue objects a second and it will make your game run extremely slow.
Finished!
Congratulations! you finished this tutorial and now you should be able to create multiple instances of your dialogue object AND have some more neat text effects.
Please let me know if you guys have any questions or anything is unclear. Also it’d be awesome if you could share this.
How do I get two of the same effects to happen at the same time, like in the title image of this page? Thanks for reading.
Hi John, I dont know if you already figured out, but you have to delete the line above //Text, which is:
draw_text(tX+(space*charWidth), tY+(13*line), string_char_at(message[message_current], i));
Cause it makes draw twice.
Hey, i ´ve run into few issues. 1.The modifier number is shown in the drawed text( /0Hello /1World/0! )
2.The gradient is replaced in a sec with white text,so you cannot see the gradient shift.
Also when the text is waving,there is also text drawn normaly behind it,makin it look kinda weird